How to Launch an eCommerce Store in 9 Steps
2020 had been one of the most challenging years imaginable for many small business owners. States ramped up lockdown procedures, restaurants turned to DoorDash and Uber Eats, and an abundance of industries were impacted by the downturn in walk-in traffic. Local communities have suffered from the departure of several shops and small business owners are left wondering how they can pivot.
A survey done by SCORE found that only 34% of small business owners said that their operations were currently profitable at the end of 2020 (compared with 55% who said they were the year prior). While furloughs and the closing of doors have been unfortunate realities for many businesses, other owners are scrambling to find ways to make up for the loss of revenue by seeking new ways to bring their product to market. In comes eCommerce.
Statistics from BigCommerce suggest that the eCommerce industry is growing 23% year-over-year, yet 46% of American small businesses still don’t have a website. Though eCommerce isn’t necessarily a prospect for every local business, for those in the world of retailing or manufacturing commercial products, there’s a great opportunity to reach a wider audience through the creation of an online sales engine.
Coming from the small business world myself, I understand the challenges that make up getting an eCommerce website running – number one being, where do I even get started? This article is intended to help answer some of the questions that brick & mortar business owners may face when trying to sell products online.
A Background of eCommerce

ECommerce, as a whole, refers to the selling of products or services online. This most commonly happens in a B2C (business-to-consumer) or B2B (business-to-business) setting, but also is possible with C2C, C2B, and other business types.
We’re currently living in the age of eCommerce, but the first experience of electronic shopping goes all the way back to 1979. This is when English inventory Michael Aldrich connected a modified TV to a transaction-processing computer via telephone line, allowing for secure data transmission to take place. Three years later, Boston Computer Exchange launched as the world’s first eCommerce company serving as an online market for people to sell their used computers.
In 2020, it’s estimated that over $4 trillion in retail eCommerce sales took place, and that number is only expected to grow as more companies look into online selling platforms, and more consumers drive the need for an increasingly convenient shopping experience. That’s highlighted by the fact that 67% of millennials and 56% of Gen Xers prefer to shop online versus in a brick-and-mortar store.
With more personalization options, increased support from web developers and designers, and well-established systems being in place, the time has never been better to consider selling one’s products online and diving into an eCommerce platform.
But… where does one even begin?
9 Steps to Getting Started with eCommerce
So, you’ve chatted with your employees, your customers, your family, your accountant, and even your cat and dog and every single person concurs that it’d be a good idea to try out eCommerce. Still, you’re not totally sure what all is going to go into the project and you want to make sure that you have a full understanding of the scope of work ahead of you. This list was intended to get you thinking about nine key steps involved with introducing an eCommerce arm to your brick & mortar business.
Step #1: Select Your Products
It’s common for retailers to want to jump in and immediately offer every single product that they can online, but it’s important to think of a few key things:
- If this product sells quickly, am I able to efficiently get my inventory back up?
- Is this product able to readily be shipped?
- Can I sell this product for a competitive price?
The Case for Inventory
In the world of Amazon 2-day (or, depending on your location, 2-hour) shipping, consumers are looking for products they can receive in short order. Having to backorder products or wait to fulfill orders due to insufficient inventory is a great way to ruin your chances at eCommerce success before you even get started. In fact, data from Clutch.co shows that 48% of online shoppers say they normally receive online orders within 2-3 days, and 45% say they are unlikely to continue ordering from a company if it delivers a package late. Ensuring you’ll have ample inventory is an important step to determining which product to sell online.
The Case for Shipping
If you’ve never had to ship oversized packages, you may not have a true appreciation for the cost involved in shipping. Though rates can be negotiated with UPS, FedEx, or USPS, it still is common for shipping to routinely cost between $10 and $40 per package. Also, those costs only go up if you have to crate an item or if you’re sending to a residential location. To make matters worse (for the seller), there is an increased push from consumers for free or reduced shipping. 63% of consumers shared that shipping costs are their least favorite part of online shipping, and 77% of brands have moved to offering free shipping on their website.
For your business, I would consider having in-depth talks with shipping providers to see what expected rates may be on your products. Give them the dimensions of several of your products, and try to find ways to make it more convenient. Knowing there’s a desire for free shipping, you can also give consideration to either (a) offering free shipping, but making up for the expected price per item to ship by increasing product prices, or (b) provide a threshold (i.e. Free Shipping over $100) that makes it worthwhile as an incentive for you to lose on the shipping costs.
The Case for Price
In a brick & mortar environment, you often have the advantage of shoppers who love to support local establishments and are willing to pay more for an item knowing that. Online, I don’t want to say that this benefit is totally eradicated, but it is definitely diminished. There are still big proponents of shopping with small businesses, but you may not have that same personal connection as you would with a customer in your town.
Research from Statista shows that 57% of online shoppers identify “cheaper prices” as a reason to shop online, and 43% say “more possibilities to compare” is a reason. Both of those mean that you will be subject to consumers checking on prices for comparable products with other online retailers. Though your potential to reach new customers expands online, so does your potential to have other companies beat you due to lower pricing. Make sure that products you can add online are either priced competitively, or contain a rationale for why they are more expensive (i.e. hand-made, made-to-order, includes warranty, etc.).
You may also want to think of whether or not a product can be personalized, or if there are multiple variations of it that can exist on the same product listing. If you’ve answered yes to the questions listed above, it’s definitely a worthwhile pursuit. If you’re unsure, then maybe opt for your “surefire” products as first additions to your online store, and know that you can always add more products over time. It’s not like a print catalog, where you’re stuck with the same product lists until you can afford to make a new catalog — with online selling, you’re able to make frequent changes and add more products over time.
Step #2: Conduct Your Research
To aptly prepare for your eCommerce website, it’s important to conduct thorough research on your competitors and the industry as a whole. You may think you have a good understanding of the competitive landscape for your type of products locally, but when you introduce your brand to an online marketplace, you’re up against almost 25 million other eCommerce websites worldwide. How many are offering the same products as you, and for what prices?
Conduct a SWOT Analysis
We’re kicking it back to Marketing 101 for this exercise, but for good reason. A SWOT Analysis aims to answer the strengths, weaknesses, opportunities, and threats that exist for your company. As it relates to eCommerce, it might look like the following:
- Strengths: price breaks, unique selling points for your product, customer service offerings, rewards programs, etc.
- Weaknesses: limits on inventory, shipping expenses, overhead with new website, inexperience in eCommerce, etc.
- Opportunities: personalization features or tools you can implement in your website, revolutionary return policies, etc.
- Threats: other businesses in the industry, looming vendor difficulties, etc.
These might look different for everybody, but it serves as a great place to assess where your business currently stands and the viability of competing in the eCommerce space. It also will be the launching pad for you learning more about other online retailers who are similar to your company that you can scope out.
Search for Competitors
Start by searching for a couple of products you plan to sell through a Google search. See who pops up first, and toggle to their page. Compile a spreadsheet showing the options they offer, the prices, and any other perks (free shipping, warranty, discount codes, etc.). Once you’ve done this for 10-15 companies, you’ll have a good idea of how to develop your business plan accordingly.
Furthermore, you can also do some industry research to see what the online market looks like for specific types of products. For example, if you’re trying to sell decorative wall art, you can look up statistics on personalized home goods to see what kind of market share exists.
Identify what People Look For
You can use tools like SEMRush and Google Keyword Planner to see how often, on average, searches take place in a month. This might help drive your understanding of how many people are looking for your products, as well as give you some ideas on how to name your products (and incorporate other keywords into your content) to get your website showing up for searches.
The more of a feel you get for the competitive landscape and the overall desire for your type of products, the better. Launching your website will require a fair amount of research beforehand to get a lay of the land, but it will also set you up for success. If you have a web company who you are entrusting this project with, make sure they do an ample “discovery” process to get to know your business and the industry.
Step #3: Get Your Brand Ready
A report by Stanford suggests that 75% of people base the credibility of a business on how their website looks. The first impression you make online is highly important, and it could be argued that the importance of your branding from a digital standpoint vastly outweighs the importance of your branding in a physical setting. When somebody walks into your store, they have scents, noises, sights, and pleasantries to welcome them. When they walk into your online store, you have a couple of seconds (if you’re lucky) to show them your brand is worth exploring. Here are a few things to consider:
Domain
Choosing a web domain that is SEO-friendly, lends itself to positive branding, and (most importantly) has not already been purchased can be a challenge. If you are a brick & mortar company that already had a website made (as a catalog/landing destination) then you’re in business. But if you have not yet purchased a domain, you’ll want to find one that is either synonymous with your brand, or has a great chance of ranking in search engines. Here are a few quick thoughts on picking the perfect domain:
- Stick with .com if you’re able to
- Use keywords in your domain name
- Keep your domain name short
- Make it easy to pronounce and spell
- Avoid double letters
- Research your domain name
- Use domain generators for clever ideas, if all else fails
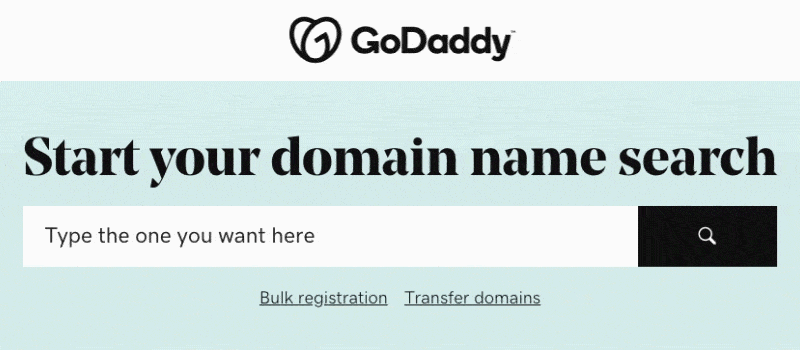
Once you have the name picked out, you’ll need to register your domain. For a fair amount of web hosting companies (i.e. WordPress, Shopify, etc.) you may have the ability to register your domain directly when signing up for hosting. If you want to register a domain name before purchasing hosting, however, you can use sites like Domain.com or GoDaddy to get that taken care of. Then, when you pick your web host you will be able to send over the necessary credentials to link it.
Logo
Your business very well may already have a logo, but it’s also possible that you’d want to look into a new logo for this site (particularly if it’s under a different name than your brick & mortar business). The logo you choose to use for your eCommerce company should include both a color and greyscale version. The color version will be helpful in identifying complementary colors to use for your web design, and the greyscale version will be necessary for saving costs on things like box printing and shipping labels. This logo will appear in a multitude of places, including but not limited to:
- Web header
- Social media channels
- E-mail newsletters and receipts
- Shipping packages and labels
- Branded merchandise
- Stickers on products
With this in mind, picking a versatile logo that can stand out to new visitors, and allow for additional opportunities for you to brand your merchandise is fundamentally important. Web designers may be able to assist you with logo design, or you can find additional opportunities online for a reasonable price.
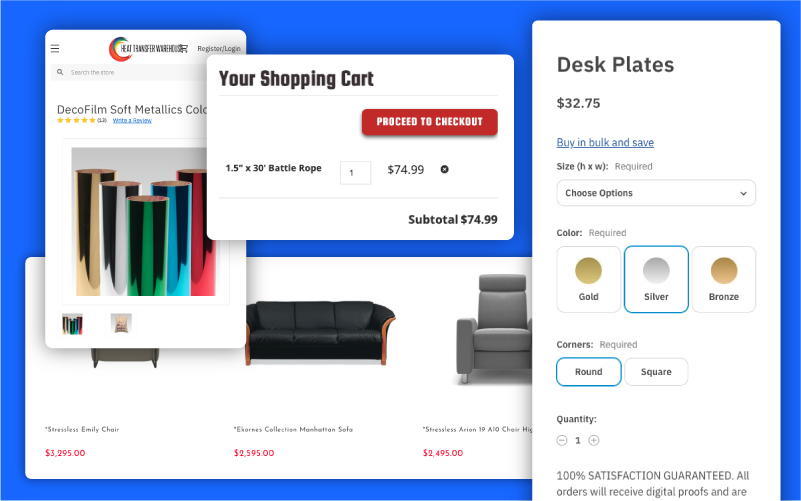
Imagery
There are several spots where photography will come into play on your website. To name a few: hero banners (on home page), category headers (on product categories), and product images (on actual listings). Having unique, branded imagery is extremely helpful in setting the tone for your company. Too often, we see companies settle for stock images on their website and they miss out on the chance to show a more personalized, authentic version of who their company is and what their products look like.
When adding imagery, however, it’s important to take the following things into consideration for search engine purposes:
- Name your images descriptively and in plain language
- Optimize your alt attributes carefully
- Optimizing your thumbnails
- Choose the right file types
- Test your images
- Reduce the file size of your images
To further expand on this last point, large image sizes can bog down a server’s response time and lead to load page speeds. Not only does this impact SEO, but also nearly 50% of consumers won’t even wait 3 seconds for an eCommerce site to load (according to data from BBC).
Developing your plan for the domain (and name of your online retailer), logo, and imagery will help you start to establish the brand feel that you aim for. To take matters further, you can also discuss a brand voice and how your content can be both SEO-friendly while also allowing for audiences to learn more about who you are. All of these tips will help you feel more comfortable with jumping into this eCommerce project.
Step #4: Choose the Correct Platform
CMS is another one of those annoying acronyms that digital marketers like to throw at you, but it stands for content management system and refers to the software used to manage the creation and modification of digital content. You’ll also commonly hear people call these “web hosts” or “web platforms,” or they’ll simply ask you “what was your website built on?” Unless you have an advanced developer team and want to build your own custom framework, it’s likely that you’ll be using an existing platform (or CMS) for your eCommerce store.
According to data from BuiltWith, the top 5 eCommerce platforms in relation to usage distribution include:
- WooCommerce (27%)
- Shopify (19%)
- Magento (8%)
- OpenCart (4%)
- BigCommerce (3%)
- Other (38%)
In conversations we have with clients, it seems to be pretty close between Shopify and BigCommerce in regards to which eCommerce platform businesses choose to use. This actually prompted us to create a breakdown between the two which can be found here.
Different platforms have different specialties, and making the decision on which CMS to use can be a tricky one. If there’s any consolation, it’s really hard to make the wrong choice (especially in the early days). You’ll find things you love and things you want to change about any platform, but the most important element for you (especially if you’re the one to be making routine product updates) is to find a platform and stick with it so you gain insight, comfort, and familiarity with how the backend (or admin panel) works. If you ever want to have a conversation with our team about which eCommerce platform is right for you, we’re here for you.
Step #5: Build Out Your Design
At this point in the process, you’ve likely either (a) chosen your eCommerce platform and found a template you like and started playing around with it, or (b) consulted with and acquired the help of a web design agency that will be taking over this initiative. The former is a less-expensive option, but the latter may provide you a greater sense of security that things are being done correctly. Either way, the process of building out your web design is one of the most important when it comes to ensuring the success of your eCommerce website. Some important considerations when embarking on the web design step include:
- Making sure your site has a mobile-responsive design
- Identifying colors and fonts to use
- Determining site layout and pages
- Collecting imagery to be used
- Retaining consistency with your brand
If you are relying on an external vendor for your web design, the more content, insights, and brand components you can provide to them upfront, the better. We encourage clients to look at websites they enjoy online and pin them as “inspirations.” This is always a healthy process in getting started with design. If you are planning to design yourself (from an existing template/theme), we’d encourage you to start by finding a template you jive with and making modifications from there. See below for some ideas, per CMS:
Within each of these platforms, if you have an account created, you have access to a variety of free (and relatively inexpensive, premium-level) themes. It’s a great place to get started, and you’re able to tinker around making edits as you please before actually launching your site.
Step #6: Get Your Systems in Place
You’ve determined your products, you’ve done your research, your brand is in order, and you’ve found a theme on your eCommerce platform to use. Now? It’s time to get your systems in place before being able to actually sell. For some, that may include developing an inventory management system, or making sure that there is an integration or compatibility with one’s ERP (so that when inventory is sold, it’s automatically taken out of your internal system, and also communicates with your books). However, every business is different so for a full conversation related to how to equip your business for eCommerce, we’d encourage opening a conversation with our eCommerce team to learn more.
For the sake of this article, I am going to go over three imperatives:
- Hosting
- Shipping
- Taxes
Web Hosting
I heard it best described as this: your website is the resident, and your web host is the landlord. You need to pay “rent” to your web host who takes care of some of the behind-the-scenes imperatives like payment processing, security, shopping cart software, and more. If you work with a web agency, there’s usually two expected payments: (a) the one-time bill for the creation of the website, and (b) the recurring monthly hosting/support fees. However, if you get your site made on your own, web hosting is just something you’ll need to be aware of. Your web host will oftentimes take care of your SSL (keeping your site secure), PCI compliance (making sure credit card data doesn’t get breeched), file sizes, backups, account information, and more.
There are a variety of different hosting options, including:
- A Hosted eCommerce Platform
- This is where you choose to pay directly for the hosting offered by your eCommerce platform.
- BigCommerce, Wix, Squarespace, Shopify, and more.
- Web Hosting Service Provider
- This is where you would outsource your hosting needs to a different company (i.e. Flywheel or Nexcess) to handle functions like compliance and SSLs.
- These are often times compatible with eCommerce platforms like BigCommerce, and they have support teams who would assist in getting you setup.
The advantage of a hosted eCommerce platform is that it’s easy to set up, can be lower cost, and is definitely suitable for low volume eCommerce needs. The benefit of a web hosting service provider is that they can often be faster servers, they have a reputation for security, and there is responsive support. If you want to learn more about web hosting, please feel free to consult our team.
Shipping
As noted earlier in this article, shipping can be one of the biggest expenses in your eCommerce venture, so it’s important that you find a shipping vendor (or vendors) that work best for you. Opening conversation with UPS, FedEx, and USPS about their rates is a great starting point. You’d be assigned a sales rep who could help develop negotiated rates for you based on expected volume. The beginning factor that you may want to consider is what is most important to you: (a) cost, (b) tracking, (c) options, (d) convenience.
If cost alone is the biggest factor, Scott Nyerges wrote a great article comparing shipping cost across USPS vs. UPS vs. FedEx. It found that:
- USPS had prices 40-55% less than UPS, and 43-63% less than FedEx
- Opting for flat-rate packaging (assuming your products can fit in those package sizes) can be a great cost saver
- FedEx Home Delivery and UPS Ground services are actually cheaper than USPS retail ground, although USPS’s flat-rate shipping still undercuts the private carriers for smaller, heavier packages
It likely doesn’t come as a surprise that FedEx and UPS have more options for time-sensitive shipping, as well as a stronger guarantee of delivery (and overall better tracking). However, if cost is king – you may find your best luck starting with USPS and then moving into an agreement with FedEx or UPS once your volume merits the change (and once you have more negotiating power).
It is nice to offer multiple different service options for shipping, but only if you plan to have your customers pay for it. In that case, offering them a more economical USPS option, with a more premium UPS/FedEx option could be advantageous in meeting a customer in the middle. I’ve also seen where eCommerce companies will allow for their customer to ship on their own account (by leaving a spot for them to enter their UPS or FedEx account #), and then they just charge a small fee for handling. Do your research, and see what works best for you. From there, you’ll be able to choose whether you want to set flat shipping prices, offer shipping incentives, or do “real-time” pricing where the customer pays whatever your cost is.
Taxes
Over the course of the last couple of years, states have begun rolling out their legislation regarding sales tax for remote sellers. Prior to this time, you only had to charge (and remit) sales tax for customers that were in the state where you conduct business. Following a South Dakota vs. Wayfair ruling in 2018, it was found that if your business has “sales tax nexus” in the same state as your customer and if that product is taxable in that state, you must charge and remit sales tax.
So how do you determine if you have nexus?
- The state is your home state
- You have a physical location in other state
- Inventory is stored in, or you drop ship from another state
- You sell products at a trade show or other event
- If you have economic nexus in that state
On the last bullet point, “economic nexus” is determined when you exceed a state-mandated dollar amount of sales or transactions in a given year. The challenging part is that this number varies in each state (though most are around 200 transactions and $100,000 in sales). To be certain, you may want to check a resource like this article from TaxJar or speak to your accountant for further clarity.
Most eCommerce platforms allow for either an integration of a tax collection application, making collecting of taxes even easier.
In addition to web hosting, shipping, and tax collection, there may be additional systems you need to get in place before you’re ready to get started. The eCommerce platform you select will request a variety of additional information about your company, and they also have support along the way to let you know everything else you need to do before starting to sell. Organize your tasks and check them off when complete – you’ll be selling in no time!
Step #7: Take Care of Your SEO
Not too long ago, we wrote an article about eCommerce SEO and how to grow organic traffic. If you don’t come from an eCommerce background, or haven’t tinkered around too much with SEO yet, it can feel like a really daunting task to get started with. Remember that the main goal is to drive relevant traffic to your website by ranking for important keywords. Here are a few considerations to get started:
Keyword Research
- Use SEO tools (SEMRush/Keyword Planner) to help research keyword volume
- Look for less-competitive keywords with mid-range traffic
- Make sure keywords are relevant to the products on your site
- Understand your buyer’s intent
- Research your competition
Site Structure
- No more than 3 clicks to get to product pages
- Navigation should match hierarchy
- Use HTTPS sitewide
- Prioritize most important pages with internal links
Technical SEO
- Create an XML sitemap and submit it to Google
- Use Google search console for performance insights and fixes
- Improve page speed to boost conversions
- Keep images under 1000 pixels wide
- Reduce image files with TinyPing and TinyJpg
- Web graphics should be .png. Photos should be .jpg
Structured Data
- eCommerce stores should include these 5 rich snippets to help improve their ranking:
- Product
- Ratings and reviews
- Price
- Product availability
- PPC
On-Page SEO
- Include product or category keywords in title, H1 tags, and URLs
- Try to have at least 300-word intro on category pages
- Try to have 1,000-word descriptions on product pages
- Include ratings and reviews on product pages
- Include keywords in meta descriptions
- Content marketing should answer question searches asks (think FAQ page)
These are just some of the helpful reminders to get your SEO taken care of when you’re adding content and technical components to your website. For more specific guidance on SEO, consider reaching out to our SEO experts to talk through your website and the keywords you wish to rank for.
Step #8: Market Your Website
Aren’t you excited you’re already through 7 steps? ECommerce sales are waiting for you. One of the last elements to consider is how to actually market and get people to your website. If you’ve diligently created your website and taken care of your SEO, you’ll have some success in pulling organic traffic into your website. However, the buck doesn’t stop there. You should establish a marketing budget (ideally, a monthly amount) that you are comfortable and willing to spend on driving traffic to your website.
Our expertise is in digital advertising, and it hinges on a funnel strategy by which you want to drive new audience members into the top of your funnel through paid search or paid social ads.
Paid Search
This method of digital advertising refers to any efforts you make to capture an audience that is searching for your products or services on Google, Bing, or other search engines. Whereas organic search rankings are determined by things like your site authority, content, and other SEO efforts, you can also rank for keywords by bidding on them. Google Search Ads (and Bing Search Ads) allow for you to identify which words you’d like to show up for (and to which audience), and state how much you’re willing to spend to be there. It’s a great way to drive some initial traffic to your website from people who are “in-market” and searching for the products or services you offer. You just want to monitor your spending carefully and make sure you’re not bidding and paying for terms that are driving the wrong kind of traffic to your site.
Paid Social
This refers to any paid advertising efforts you make on social media platforms (most notably, Facebook). Facebook’s ad platform is very robust and offers a great way to target individuals based on demographics, geography, and more. You can even upload contact lists and target those individuals, or find a “lookalike” audience. The difference between paid social and paid search is mostly around intent — on paid social, you’re delivering ads at a time that they are not necessarily searching for your product. As a result, compelling designs and copywriting that drive them to click through is important.
With both paid social and search, it’s important to also set up “remarketing” efforts. Once they’ve already seen your website and interacted with you (through ‘top-of-funnel’ activities), you can deliver new messages and calls-to-action to them through remarketing efforts.
Getting Set Up
Whether or not you plan to launch paid digital advertising efforts when your site launches, it’s important to get some accounts set up which will allow you to successfully do so in the future.
- Setup Google Analytics
- Go to google.com/analytics to get started
- Set up properties and reporting views in your account
- Set up the Analytics global site tag on your site
- Add necessary users to your Analytics account
- Use this to monitor site traffic and learn more about your audience and how they’re interacting with your site – it will help you make key decisions on how to proceed moving forward.
- Setup Facebook Business Manager
- If you have a page all ready to go, you should create a Business Manager to allow you to manage your Pages, Ad Accounts, and more.
- Go to business.facebook.com/overview
- Create your account
- Fill in your business information
- Click submit
- Add necessary users to your business manager
- Add pages to your business manager
- Get Ad Accounts Created
- Create a Google Ads account
- Create a Facebook Ads account
- Create a Facebook Pixel, and install that code to your website so that you can begin tracking and targeting users on Facebook/IG.
- Look into other paid social and search accounts that you can add, and follow similar steps.
With the hefty expense related to getting an eCommerce website set up, it’s tough to consider throwing additional marketing expenses on top of that to drive people to the website. If you’d like to begin with simply doing organic efforts (organic social media page content, lots of energy surrounding SEO, emailing contacts to check out your site, etc.), feel free to start there. However, to get things off to a roaring start we do definitely advise that you set aside some dollars and energy for paid digital marketing, as well. We’d love to chat with you about what to expect.
Step #9: Routine Revisions
Keeping your content fresh is not only a good practice for SEO purposes, but it’s also an imperative based on early feedback you get from customers. You’ll want to make routine updates to your site, with everything from changing out hero banner images to adding new products and additional FAQs.
If your web agency has a built-in support feature (allocated hours per month to conduct this work), you’ll want to think of which tasks you’d like to send their way. If you plan to be the one making these edits, make sure that you have a thorough understanding of how to make changes on your website without wrecking anything (just kidding, if you’ve got your hosting figured out, they’ll be doing backups so you can never do too much damage). Spending some time on your eCommerce platform’s forum will give you insight into what other companies are changing on their site, and may serve as a great place for you to draw new ideas and inspiration.
At AdShark, we believe that routine optimization is the biggest differentiator between those who market well and those who market poorly.
Tying it All Together
Getting started with an eCommerce site can be a great way for brick & mortar businesses to find a new audience, and open up new sources of revenue for their company (which is needed now more than ever, as we inch our way out of a global pandemic). Once you’ve made the decision to get started with eCommerce, there are nine steps that we outlined above which will help get you going:
- Selecting the products you wish to retail
- Conducting research on your competition/industry
- Getting your brand ready
- Choosing the correct eCommerce platform
- Building out your design
- Getting your systems in order (hosting, shipping, taxes)
- Taking care of your SEO
- Marketing your website
- Routine revisions
Along the way, if you need any assistance from our team, please feel free to contact us about how to get your eCommerce website going. In our seven years, we’ve been able to help 165+ clients with their digital advertising or website needs and we’d love to add to that list.

Ready To Grow?
Let's Talk!
