
How to Track Offline Sales Through Facebook Ads
One of the greatest advantages of digital advertising over traditional? Being able to track return on investment. With eCommerce brands, it’s easy as pie. With brick & mortar businesses, it’s more difficult…
…but it’s still possible.
Today, we’ll be looking at Facebook Ads specifically and how organizations who record offline sales can try to gauge a return on ad spend (ROAS). Let’s dive in!
Why Does Tracking Sales Matter?
Since our agency began in 2013, we have been hellbent on tracking as many key metrics as possible. Why? Because it helps show the value of the advertising. Without sales tracking, it’s impossible to gauge a true return on investment for your digital ads.
Here are three reasons why you should consider tracking offline sales:
- It helps you understand ROI. If you can get to a point where you see that every $1 you spend on Facebook Ads generates $3-5 in sales – you’ll be able to justify increased ad spend and scale.
- It helps your advertising perform more effectively. Once you start feeding conversion data to Facebook, Facebook will learn from it and decide which potential customers are best to serve ads to.
- It helps you realize which creative and which campaigns are performing best. What better way to A/B test different concepts. Comparing the revenue attributed to specific campaigns or specific ads will help you see which ones are winners, and which ones can be paused or deleted into oblivion.
As you look for ways to improve your Facebook Ads performance, tracking sales is the crucial starting point. Without this key data, you’ll be missing out on great opportunities to analyze and optimize your campaigns.
Step-by-Step: Tracking Offline Sales on Facebook Ads
Alright, let’s get to the meat and potatoes of this blog. You came here to learn how to start tracking offline sales, and I bored you with filler content for 2 previous sections. My bad on that.
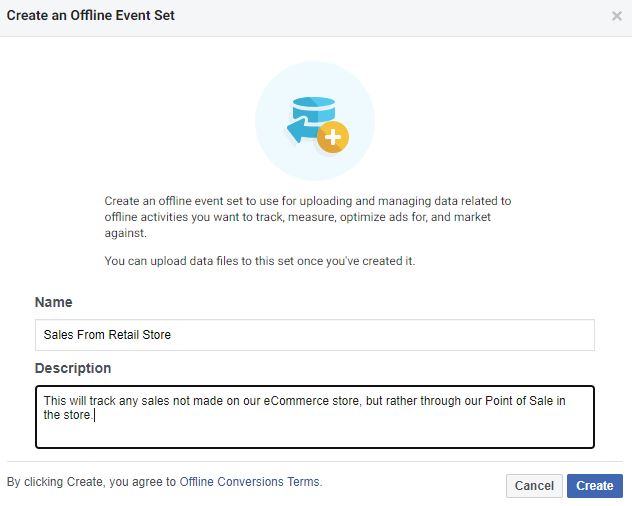
Step One: Create an Offline Event Set
- Go to Business Manager
- Under Data Sources click “Offline event sets”
- Click the blue Add button, and then start creating your offline event set
- Enter a name and description that you (and others in your business manager) will recognize and understand.
- Assign the event to your Ad Account(s).
- Assign your event to specific people (if applicable) within your Business Manager.
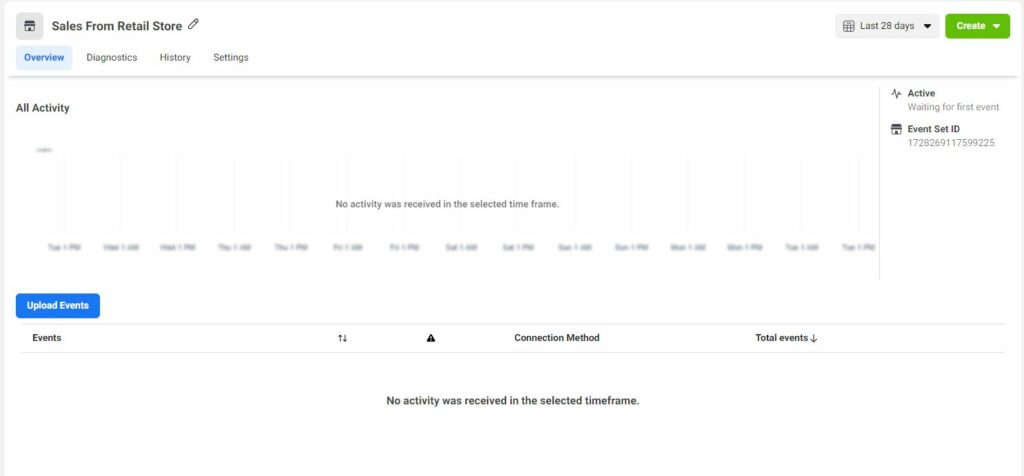
Step Two: Visit Events Manager
- Find your offline event under Data Sources and by searching for the name of your event
- Click on the event and then in the upper right corner, click Open in Events Manager
- On Events Manager, you can now Upload Events
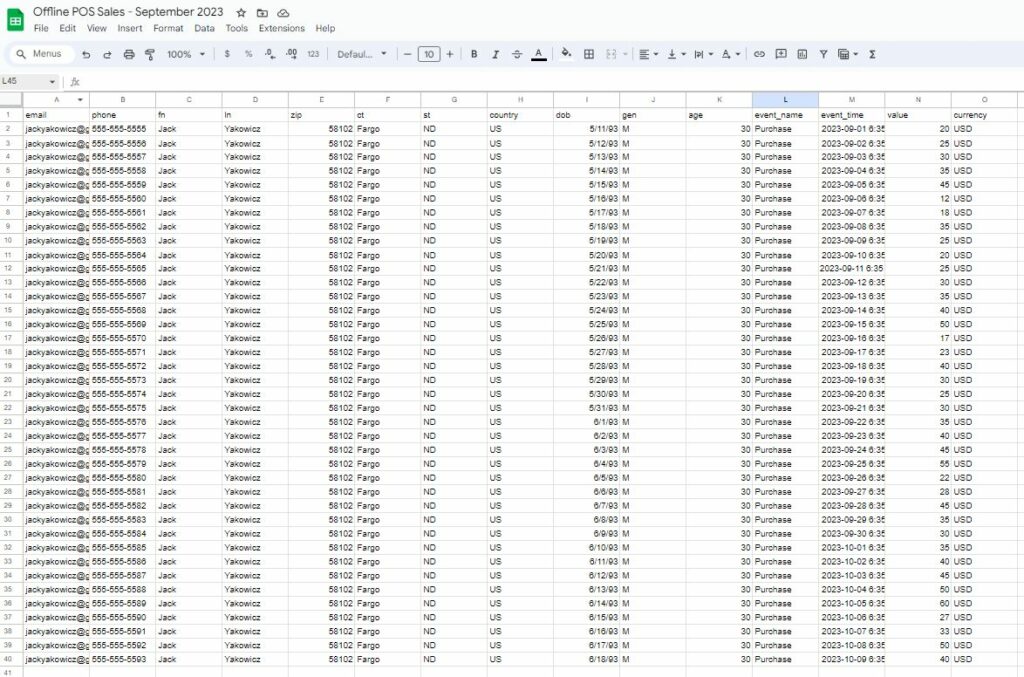
Step Three: Prepare Your Spreadsheet for Upload
- From your point of sale, CRM, or other data recording device, prepare a csv (spreadsheet, exported as csv).
- Try to include as many details as possible in your columns on your spreadsheet, including:
- Customer Details: email, phone number, first name, last name, ZIP/postal code, city, state, country, date of birth, year of birth, gender, and age.
- Most importantly: email, phone number, first name, last name, city
- Event Time: the time at which the purchase (or event) took place
- Event Details: conversion value (sale amount), currency (USD), order ID, item number, event name, data processing options, data processing options country, data processing options state
- Most importantly: conversion value, currency, order ID, item #
- Customer Details: email, phone number, first name, last name, ZIP/postal code, city, state, country, date of birth, year of birth, gender, and age.
- Export your spreadsheet as a CSV and prepare to upload it to Facebook.
Facebook also provides this helpful template (downloadable CSV template) if you are stuck.
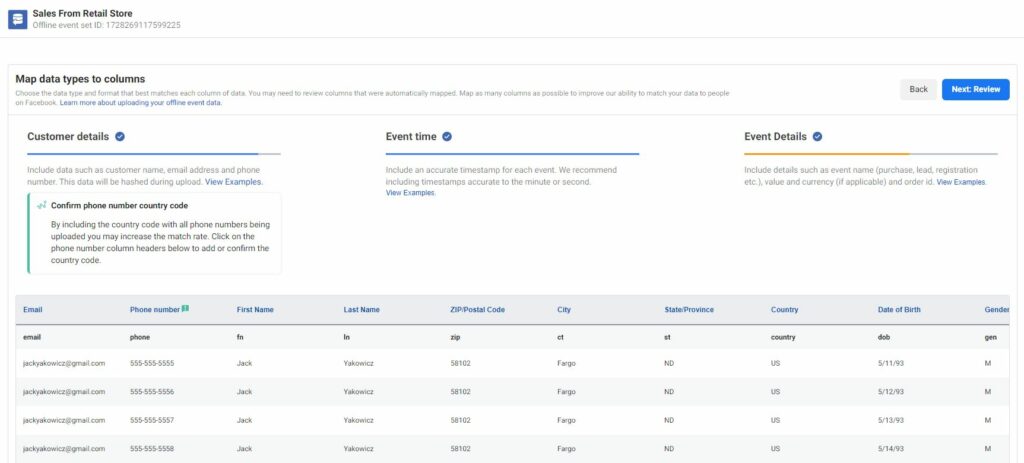
Step Four: Upload Events
- From Events Manager, click the blue Upload Events button and add your csv
- Click Next: Map data
- Map your data by making sure that your details, event time, and event details all have checks next to them. Click Next: Review
- See your “accepted” and “matched” events
- Submit.
Step Five: Track and Measure Results
- Over time, you should see your conversion value continue to grow and can keep an eye on how your offline events are performing in Facebook.
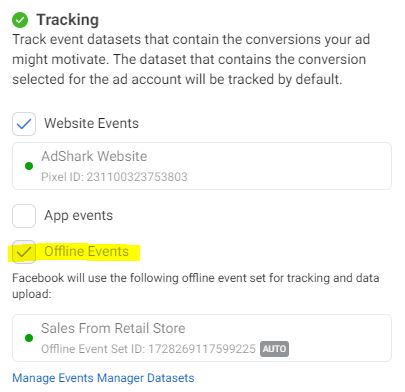
- Make sure when you create a new AD (as seen below) that you are checking Offline Events to make sure that future results are being tracked.
- Routinely review data to see what the conversion value is (and return on ad spend is) for various ads and campaigns.
It is important to also note that you have 90 days from an ad impression to upload the data. If you create an offline event set and have not uploaded any data within 90 days, your timeline for uploading data is reduced to 35 days. Facebook recommends uploading data daily. AdShark recommends uploading data at least once a month.
If you’d like to help in learning how to track offline sales for your business, or you’d just like another set of eyes on your Facebook Ads strategy, please contact our team. We’d be happy to chat through paid social strategy, data and key metrics, and anything else you’re interested in learning more about. In the meantime, please continue to page through our blog for more helpful resources. See you again next week!
Ready To Grow?
Let's Talk!
