How to Increase Local Business with Bing Places
Bing Crosby, Bing Bong, and Bing Places. One was a multimedia star, one was a TikTok phenomenon in 2021, and one helps your business grow. Though we appreciate all of the bings we’ve encountered, today’s blog will exclusively focus on Bing Places and how you can use it to drive local traffic.
It’s commonplace for businesses to focus exclusively on Google’s business listings, and we don’t blame them. Over 86% of online searches take place on Google, compared to 7% on Bing (via Statista). However, neglecting your Bing business listing can lead to potential loss of customers and SEO kerfuffles.
Here are a few quick stats to highlight the importance of focusing on Bing Places:
- Bing usage is growing. Bing’s market share has grown by 1.23% since 2019, and has grown by 6.15% since 2019 for desktop search (via Backlinko).
- Bing is particularly popular in the US, with older populations who have higher income. 85% of Bing users are in the US, 70% are older than 35, and 38% have a household income exceeding $100,000 (via 99Firms).
- Name, Address, and Phone discrepancies can severely impact local SEO. Ensuring that your key local details are consistent across all online directories (GMB, Bing Places, Yelp, etc.) is imperative for local search visibility.
Though Bing Places’ usage still pales in comparison to Google My Business, ignoring Bing is not a viable option for local businesses. Claiming your listing and making optimizations to your page can help you reach new local customers and stave off SEO shortfalls. In the following sections, we’ll help you master your Bing Places listing!
How to Claim Your Your Business Listing on Bing
Step One: Checking to See if Your Business is Already on Bing Places
- Open up Bing and search for your business name
- If a listing exists, it will show up on the right side of the search query like so:
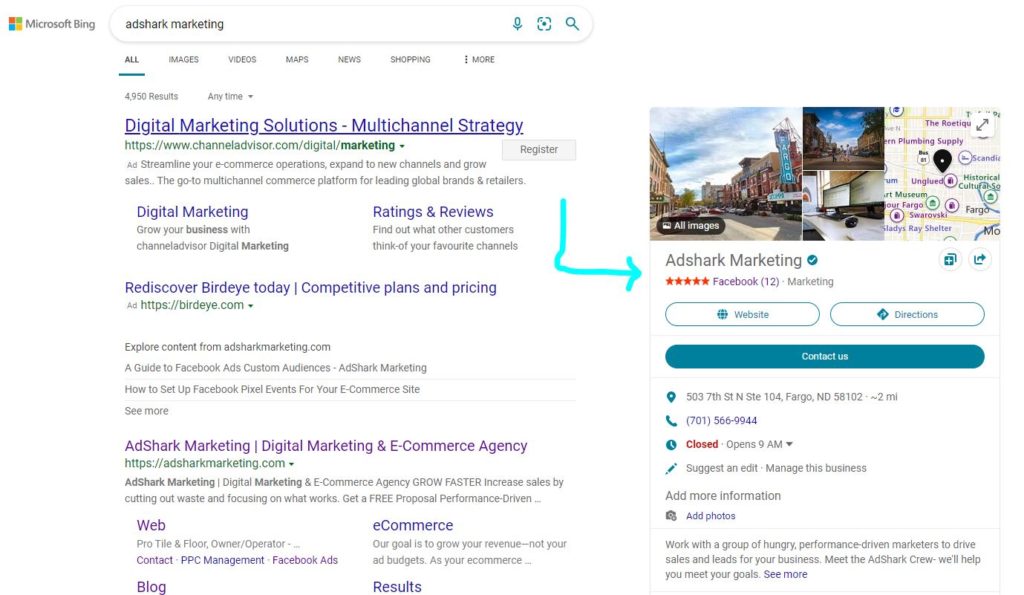
- If you do not have access to this listing, you can click Manage this business to claim ownership of the listing, and optimize it.
- Note: Bing may have created a listing on your behalf from records it pulls from other sources. Don’t fret!
- If you do not see a Bing listing when you search for your business, that means that nobody from your company has created a listing and/or Bing hasn’t created one on your behalf either.
Step Two: Log in to Bing Places
- Visit BingPlaces.com to get started
- Click New User on the home screen, and you’ll be brought to this screen:
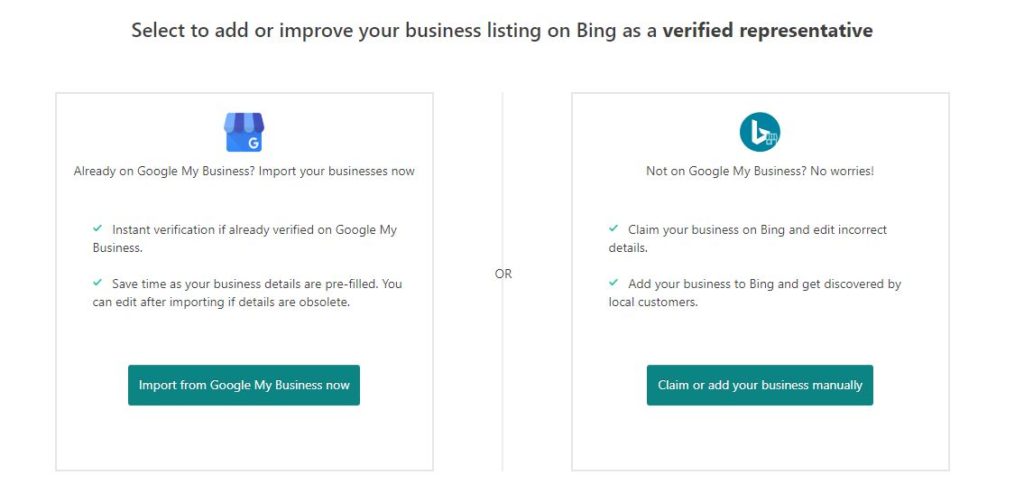
- If you already have a Google My Business listing for your company, you can Import from Google My Business. Otherwise, select Claim or add your business manually.
- Importing from GMB is a breeze – so we’ll bypass that step, and just focus on claiming or adding your business manually instead.
Step Three: Adding Your Business
- Select your business type (Small Business of 1-10 locations, Chain business of several locations, or Online Business). If you’re an agency, you can also select the “I manage listings on my client’s behalf” option.
- Select your country/region.
- Enter your phone number and/or your email address to search for your business. Once your business has been found, a screen will appear like this:
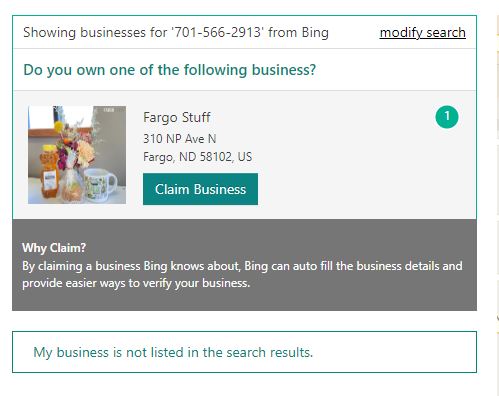
- Click Claim Business if it matches yours, and then log in to your Microsoft account, or create an account (signing up via Google, Facebook, or starting from scratch).
- Once you’re logged in, review the listing, focusing on editing what you’re allowed to.
- Note: you will not be allowed to edit everything until your business has been verified! Things like name/phone/website/etc. will become editable once you’re verified.
- Select the segment of business and categories (add multiple, if you can!)
- Select the primary category
- Describe your business
- Note whether customers can visit this address or not, and enter a unique store code if applicable. Note whether you’re a business (multiple employees) or a professional (a single therapist, doctor, etc.).
- Fill in your customer-facing email and social media links
- Add business photos
- Enter your hours and click Submit.
Step Four: Verify Your Business
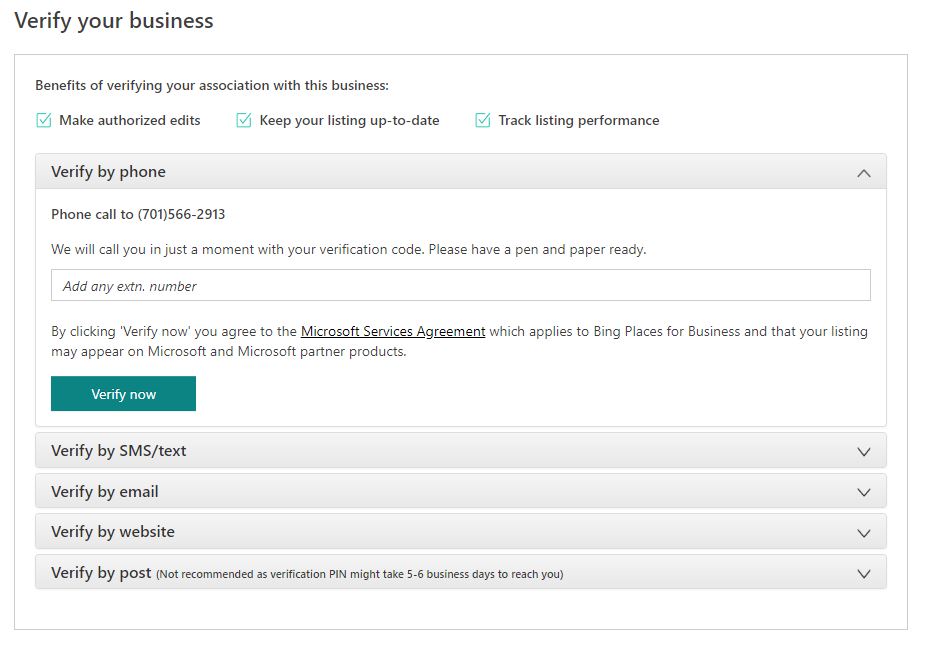
- Choose the route in which you’d like to verify your business, between:
- Phone call
- SMS/Text
- Website
- Post/snail mail (this can add 5-6 days to the verification process!)
- Bing notes that it can take up to 2 weeks to verify your listing, but we find that it typically moves a bit quicker than that (more like ~1 week).
- Once verified, you’ll be able to make all edits to your listing!
Making Optimizations to Your Bing Places Listing: Improving Local SEO
A few months back, we published a blog about making optimizations to your Google My Business page and how it can bolster your local SEO. With Bing Places, the methodology is similar: the more complete your listing is, the better it will perform.
When making optimizations on Bing Places, you can save yourself some time by copying over information from your Google My Business listing. For example, utilize some of the same photos, same bio/descriptions, and more. If you’re starting from scratch, however, here are some recommendations below:
Step One: Log in to Your Business Listing
- Visit Bing Places and login to your dashboard
- If you have multiple listings, click on the listing that you’re looking to optimize
- You should now be looking at your My listing page on Bing Places
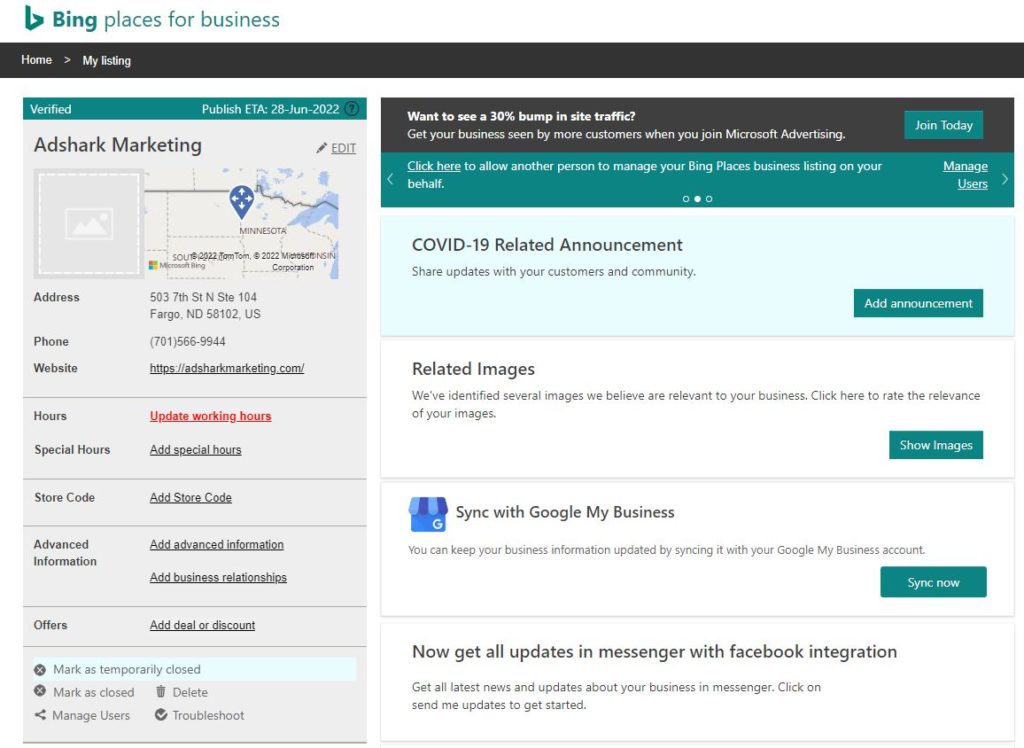
Step Two: Edit Your Listing Information
- Click Edit in the top left corner to start making changes
- Verify your business name, phone number, address, and website are correct. Move the pin on the map if necessary.
- Select your business segment and categories. Note: add as many categories as are applicable to your business, and select the main one you’d like to show up for as your “Primary” category.
- Fill in your description, making sure to add terms that may be potential keywords when searched locally.
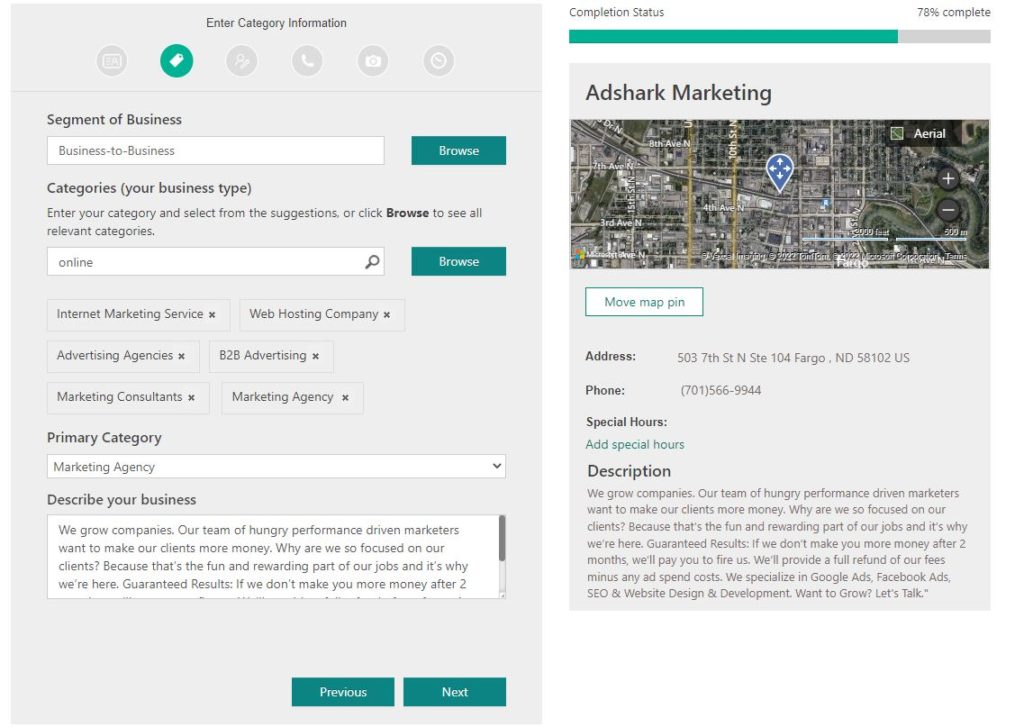
- Check the box if customers can visit your address, add a store code (if applicable) and note whether it’s a business or professional.
- Enter your customer-facing email address and add links to your social media networks.
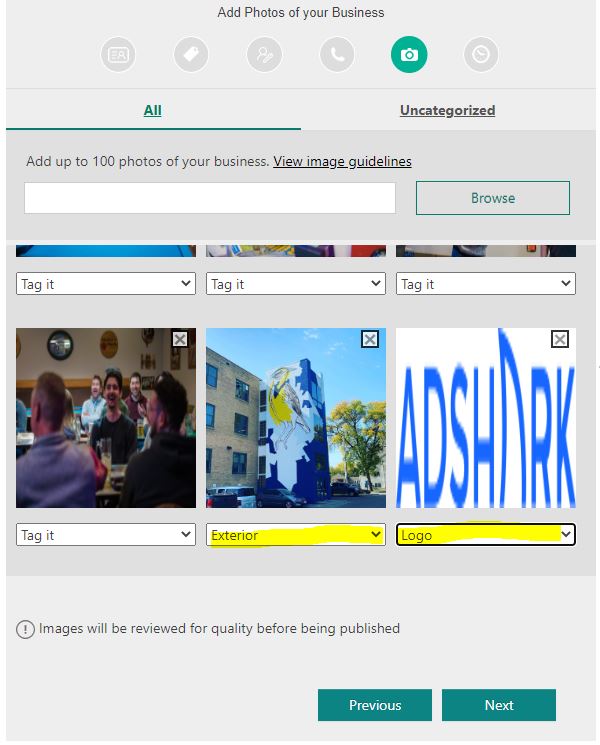
- Add photos to your business page. Select photos of both the building itself + photos that relate to the services you offer + photos of the team. We’d recommend starting with 10-20 photos.
- From the images, make sure that you have at least one that is your logo and one that is of the exterior. From the dropdowns, select “Exterior” and “Logo” respectively.
- Under the Business Hours section, choose “Show business hours” from the dropdown, and enter your hours.
- You can also select days that you will be out for holidays.
- Click Submit to finish editing your business listing.
Once you’ve finished submitting your changes, it can take a few days for Bing to update the changes that you have made. Please allow up to a week!
Final Tips for Optimizing Your Bing Places Listing
Now that you’ve created your listing, and have made some initial optimizations, you are already well on your way to having Bing users find your business! A strong majority of customers that come our way haven’t touched their Bing listing at all.
To get your Bing listing to go to the next step, here are a few quick reminders or notes that will set you apart from the competition:
- Ensure that your Bing listing is 100% complete. Don’t leave any boxes unfilled, add photos, be descriptive in your business summary.
- Choose great photos. Get a variety of photos. Ensure that you have at least one of your interior, one of your exterior, and one of your logo. Beyond those, show photos of customers using your products/service, employees donning your branded apparel, and more.
- Drive Reviews. Unlike Google, you can’t get people to go directly to your Bing Places listing and write a review. Instead, Bing pulls reviews in from Yelp, TripAdvisor, and Facebook. Try to drive reviews to these locations instead!
- Maintain an optimized website. This will influence your local rankings on Bing too. Need tips on how to do so? Contact our SEO experts.
In addition to these changes, there can be value in tying in Bing Advertising to your efforts. These will run similar to Google Ads, but typically have a lower cost-per-click and less competition. For certain local businesses, it makes sense to run paid search ads to drive even more traffic to their business and/or website.
At AdShark, we love having the chance to help local businesses identify new customers and grow their revenue. Though we devote a lot of our energy to Google, we also recognize the value in improving one’s Bing presence in order to rank for local searches. Creating a Bing Places account and making optimizations to it is a great place to start!
If you’d like to connect with our team to discuss additional ways that we can support your growth, please reach out! We’re happy to work with budgets of all sizes & provide advice on how to scale. Thank you for reading this blog & good luck getting started with your Bing listing!


